Getting started in vermicomposting or worm bin composting as it is often referred, is a simple and low-cost solution for may who may not have the room in the yard for traditional composting methods, or for those who want to try other methods of composting common kitchen and household scraps.
If you’re into organic gardening but live in, say, an apartment or a community where the HOA rules forbid outdoor composting, you’re likely searching for a solution to organically feed your plants and flowers. That solution, if you have a small space available inside, is vermicomposting.
Like traditional compost, vermicompost is an excellent nutrition source for your plants, veggies, and flowers. The biggest difference, however, is that, unlike regular compost, vermicompost can be produced indoors using worms to speed up the process.
Using a combination of worms (more about the specific type later), bedding material and vegetable matter, vermicompost is made in shallow, covered bins. They’re covered because worms don’t like light, but they do like eating the scrap veggies and other food waste they receive and turning them into worm poop (called castings), which is packed with vitamins, minerals and all sorts of other stuff that plants need to thrive.
Which Worms Are Best for Worm Bin Composting?
You may already know how wonderful worms can be if you’ve had an outdoor garden before. Outside, earthworms work very hard to digest food waste and make compost, but they have 1 drawback that makes them a poor choice for vermicomposting; they need deep soil.
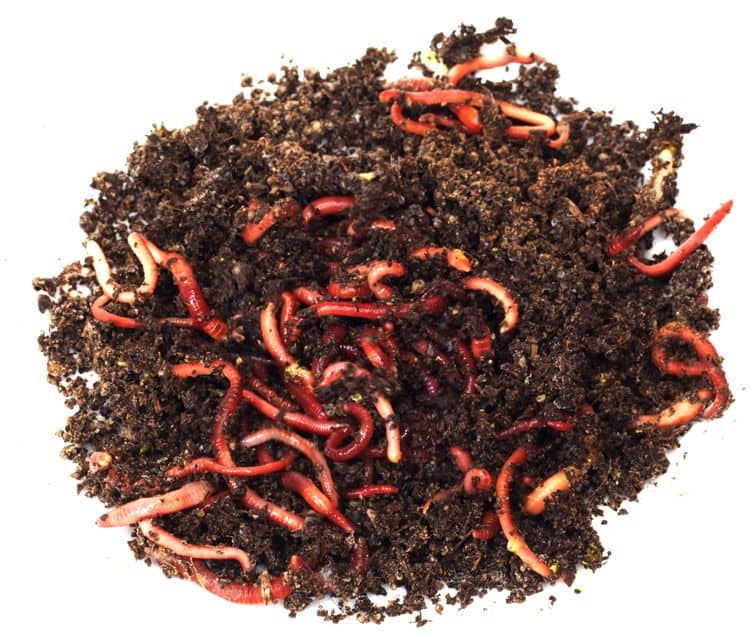
Since vermicomposting is done indoors using shallow bins, a better choice of worms would be red wiggler worms, the kind most people who fish know about from purchasing them at their local bait and tackle shop. You can also find red wiggler worms being sold online, usually from nursery supply retailers. There are several other species of worm that live and eat close to the surface, like European nightcrawlers and blueworms, and they work well also, but red wigglers are really the best in most cases.
So, again, the worms you find outside in your garden, while they are fantastic, shouldn’t be used in your vermicomposting endeavor because they need deep soil and your vermicompost bin will be relatively shallow.
What Is Red Worm Composting?
Red worm composting is the exact same thing as vermicomposting with a slightly different name based on the red wiggler worms that are used in the process. It’s also known as worm composting since different species of worm can be used.
Setting Up Your Worm Composting System
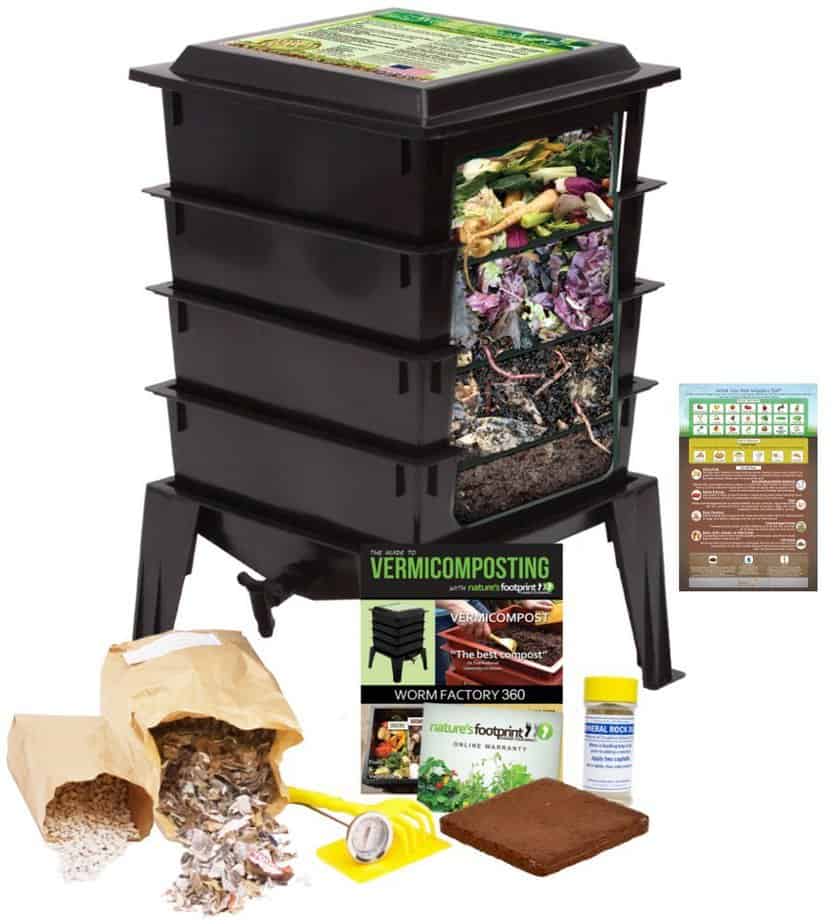
If you want to get started as quickly as possible with vermicomposting, the Worm Factory 360 Worm Composting Bin is available on Amazon. The entire kit comes with almost everything you need to start right away including 4 stacking trays, bedding material and detailed information on how to set it up and go.
All that is left is to add the worms. Red wigglers are best and these too can be found from a small family-run company available on Amazon to residents in the United States.
Red Wigglers can also be found at local bait and tackle shops and some local garden centers.
That being said, if you’re a DIY type of person, you can also make one in a few hours with some basic tools.
Keep in mind that your vermicomposting bin will hold worms, soil and, frankly, garbage in the form of food waste. If you make it yourself you should have the skills and experience to make it well so that it doesn’t fall apart and create a gigantic mess inside your home or apartment.
What Building Materials Should You Use?
The easiest way to set up a vermicomposter is with a larger, plastic container. Rubbermaid or any other brand would work just fine. You can use wood or metal as well but both decay and/or rust over time, and some types of wood have resins that can hurt or kill your worms so, again, plastic is best.
For some, the prospect of building their own vermicomposting bin is a joy and, if that’s you, make sure you purchase wood that hasn’t been treated with anything. Pressure-treated lumber is included in that as the chemicals used can and usually will leach out, which, again, could hurt or kill your worms.
Leftover exterior siding or the wood from a pallet can be used without any problems, or any type of scrap wood you might have laying around your home or apartment. Remember that you will also need a lid or top for your vermicomposter and so if you’re purchasing wood, buy enough to make the lid.
What Size is Best?
The answer to this question depends on how much food waste you and your family make each day and week. 1 or 2 people will create approximately 4 pounds of waste a week while a larger family could make upwards of 6 pounds or more.
For 1 or 2 people a container that’s 8″X8″X4″ should suffice, while a larger family should probably use a container that’s 1′ X 2′ X 6″. That equals about a square foot of surface space for every pound of food waste, give or take a few ounces.
Whatever size you choose, do keep in mind that you’ll need enough space in your home or apartment to place your vermicomposter. It should be well-ventilated and easily accessible, with plenty of floor space for when it comes time to collect your compost.
Creating Ventilation Holes
To prevent your red wiggler worms from dying due to a lack of oxygen, you need to create ventilation holes on both the side and bottom of your bin. Also, you’ll need a tray to place underneath to catch the liquid that drains over time, called ‘tea’, otherwise, your bedding will rot and start to smell. You can make them with either a sharp knife or a drill.
Some experts will tell you that placing a layer of small-loop chicken wire or netting at the bottom of your composter bin is a good idea. Frankly, unless you make very large drainage holes, that shouldn’t be necessary. On the other hand, it won’t negatively affect your results and so, if it makes you feel better knowing nothing can fall out or escape, you can certainly do that.
What Is best to Use for Bedding?
Normally in the wild leaves and other natural debris makes the bedding worms use to live, eat and make compost. You can certainly use the same if you have access to it, or you can also use either shredded paper, newspaper or cardboard. The main thing to remember is that your bedding should be able to easily retain moisture and so, if you like, you can also add some natural peat moss. (Peat moss is like a sponge.)
The reason your bedding needs to absorb water and stay wet is simple; worms are between 75% and 90% water and, if their bedding dries out, they will dry out also and then die. So wetting the bedding when you make your composter and then keeping it moist al the time is vital.
Also, once you have your bedding in your bin, throw in a handful or 2 of good soil, which will provide the grit that your worms will use to digest their food correctly. After that, mix your soil/bedding mixture well and spread it evenly in your composter bin.
Note that you can use any kind of paper you wish for this. Newspaper is usually handy but paper bags, paper towels and anything else made of paper would work just fine. In fact, the ink from newspaper isn’t exactly healthy and so avoiding newspapers might be a better idea. Paper without any ink or printing on it would be best.
What is the Optimal Number of Worms?
Unless you like counting icky, sticky worms, you should buy them by the pound. The number of pounds you need should be based on the size composter you’ve created, and the size of your family. (As explained above.) For example, if it’s just 1 or 2 people and you have a small composter than 1 pound should be fine as 1 pound of worms can consume about 3 to 4 pounds of food waste in a week’s time. If your family makes 6 pounds or more, 2 pounds of red wiggler worms would be best.
Keep in mind that, over time, some of your red wiggler worms will die and others will make babies. Depending on how many die and how many babies are born you will likely need to purchase more down the road, although if everything is optimal and your worms are healthy that might not be necessary.
When is it Best to Add the Worms and Food Waste?
After you’ve made your bedding/soil mixture and spread it evenly in your composter bin, add the worms on top and spread them around as evenly as possible. You’ll notice that within a few minutes they will all have burrowed down into your bin since, as we mentioned earlier, worms don’t like the light.
Once you see that all of your worms have burrowed out of sight it’s time to add your food waste on top. Then, close up your vermicomposter until you have more food waste to add and let the red wigglers do their thing!
What Type of Food Waste Works best?
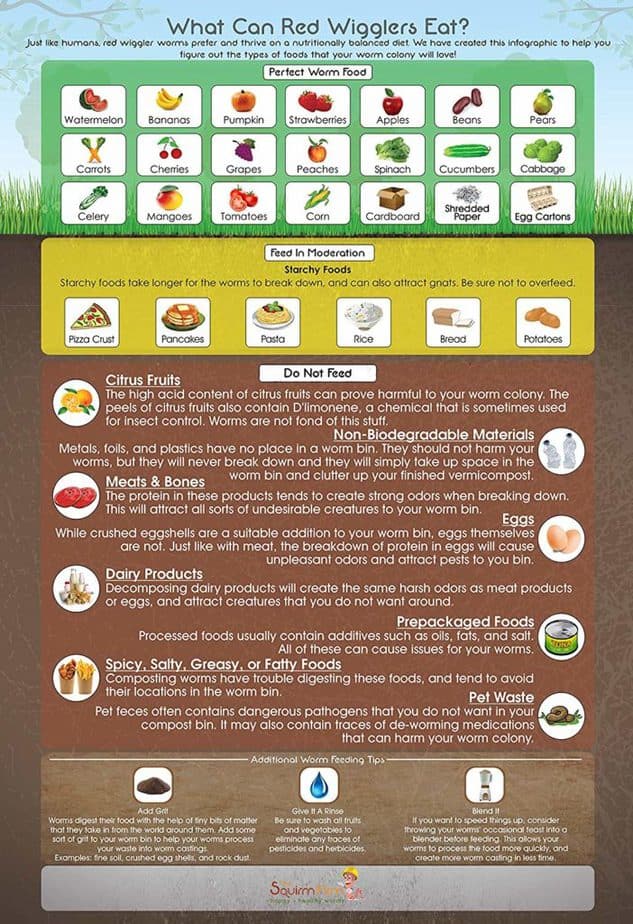
One thing to keep in mind when adding food waste to your composter is that, if you add meat, cheese, bones, fat and other animal waste, it could easily and quickly start to smell, and sometimes smell quite awful. For that reason, using anything that’s food but not animal food is better.
Peels, apple cores, eggshells, stale bread and crackers, the waste from a juicer and even coffee grounds will work just fine and shouldn’t create a bad odor. Note that, if you like, you can use animal food waste because worms will eat that too, but again the smell is a big concern. If you don’t mind it or put your composter out on the porch then go for it.
The best way to add your food waste is to dig a hole into the bedding and place the waste down into it. Then, cover the food waste with the bedding and leave it alone. That’s right, there’s no need to stir the bedding/food waste mixture and actually it’s not recommended (even though it seems quite tempting). Just add the food waste and let you friendly red wiggler worms do the rest.
When Is It Time to Harvest the Vermicompost?
This depends on your worms and the amount of food waste you’re giving them. Normally, about 4 to 8 weeks after starting, the bedding in your composter will turn dark brown and the worms will slow down considerably in terms of eating the waste and converting it into castings. Once this happens, it’s time to harvest your compost!
One thing to remember is that, depending on the worms, food waste and where you’re located in the US, it could be a shorter or longer period of time between starting and harvesting your compost. Luckily the red wiggler worms won’t rush the process or rush you, so be patient.
Also, if you don’t see the food waste disappearing very fast (or at all) check to make sure that your bedding is moist enough and that your worms are alive and thriving. Remember that worms are mostly made of water and need to stay moist in order to survive, thrive and make awesome compost.
What Is the Best Way to Harvest Vermicompost?
Basically, there are 2 techniques to harvesting vermicompost, 1 that’s kind of ‘icky’ and another that’s more straightforward and less icky. Also, #1 takes a lot more floor space and so, if floor space is at a premium where you live, #2 might be best.
#1/ Icky– For this technique, you’ll need a large piece of plastic, preferably 8′ X 8′, that way you don’t have a huge mess on the floor to clean up afterward. Open the plastic and place it on the floor and then pour out your vermicompost onto it, with a bright light shining overhead.
Next, make 9 equal piles of compost and watch/wait as the worms in it burrow down to get away from the light. Once they do, take off the top layer and place it in a large plastic bag. Do this as many times as it takes to get down to just a small amount of compost and mostly worms.
Next, collect and weigh your worms to make sure you still have enough for the amount of vermicompost you want to make, keeping in mind that some will have died and others will have been born. If you have more than when you started great, and if less you’ll need to purchase more worms.
Then, simply place new bedding into your composter, plus your worms, and let the process start again. In bout 4 to 8 weeks repeat the process.
#2/ Less Icky– With this technique your compost will stay in the bin. What you need to do is push all of it to one side and then put new bedding on the other, now empty side. Then add your regular food waste and cover. In about a month the worms will all have migrated to the other side of the composting bin and you can then remove your fresh vermicompost from the other side and place it in a large plastic bag, never having had to touch any worms!
Repeat this process every 4 to 8 weeks and you’ll keep getting newe vermicompost on a bi-monthly basis.
Why is Vermicompost Better than Ordinary Garden Soil?
While the potting or garden soil you can purchase at your local nursery or garden center isn’t all bad, vermicompost is much better in several ways that make it ideal for use in your garden, potted plants and so forth.
- Vermicompost has 5X the Nitrogen and 7X the phosphorus, both minerals your plants need to thrive
- Vermicompost is 100% organic
- You know exactly what’s in your compost because you make it at home
- It costs less in most cases
- No need to transport large, heavy bags of soil
- Not made, processed and bagged in a factory and so much better for the environment
- Allows you to get rid of your food waste in a better way than simply throwing it in the trash
What is Vermicompost ‘Tea’ and Should You Keep It?
As we’ve mentioned, when making vermicompost there will be a liquid that drains out of the bottom of your composting bin and, to catch it, you need a tray underneath. While some might think this liquid should be thrown away the exact opposite is true.
Like the vermicompost that you’re making the ‘tea’ or leachate is also an organic fertilizer that’s wonderful for your plants and flowers. In fact, it’s even more concentrated than the vermicompost itself and thus should be saved to use on them. And no, you shouldn’t drink it, in case you were wondering. It’s not tea in the normal sense of the word and, frankly, will be quite stinky and gross.
Can You Vermicompost Outside?
Yes, definitely. The fact is, using worms to break down your food waste into compost faster is the best reason to vermicompost. It keeps down the smell, gives you compost faster and cheaper and is better for your family because it’s organic.
The same type of set-up should be used, and the same kind of worms, if you want to have the best results. Yes, earthworms can and will do the job but, as they burrow much deeper than red wiggler and other types of shallow-burrowing worms, buying the right worms will make a difference.
In Review
Here are the basic steps to setting up your vermicompost bin at home. Follow them and you should get perfect results. If you don’t, be patient. Mother nature has given worms the ability to do magical stuff but, like any living creature, they don’t always do things on any specific schedule.
- Make or purchase a container/bin to use as the vermicomposter. Plastic bins work best but untreated wood and/or metal is also ok
- Purchase a pan or pans to catch the ‘tea’ (leachate) that will flow out of the bottom of your composter
- Shred paper and cardboard to use for bedding. It should be ink-free if possible
- Add peat moss for moisture regulation and to keep your worms happy and healthy
- Purchase and add worms based on the size of your composter and family needs.
- Add food waste as your family makes it
- Never stir the bedding/worms/food waste. It’s not necessary
- Remove the compost after 4 to 8 weeks
- Repeat the process
Pros and Cons of Vermicomposting at Home
As with anything in life, there are pros and cons to vermicomposting that you should consider before you start so that you get the best results (and don’t make your neighbors angry). Frankly, if you’re doing it the right way and inside the pros outweigh the cons by a good margin.
PROs to Vermicomposting at Home
- Uses food waste and keeps it out of landfills
- Less odor as worms break down compost faster
- Easy to set up with a minimum monetary and/or time investment
- Less garbage which may lower your garbage removal costs
- You’ll have fresh, 100% organic compost that you’re positive is made from great ingredients
- Can be fun and interesting for the entire family
- Is great for the environment
- Will make your plants, flowers and vegetables grow much better, healthier and produce more
- Can be done inside your home or apartment
- Can be done in smaller batches
- Fewer trips to the garbage dump if you get rid of your own garbage
- Makes a great gift for a friend who has plants and wants the best compost
CONs to Vermicomposting at Home
- Can create some odors, especially if you place animal food waste inside the composter
- Produces a small amount of greenhouse gases, including nitrous oxide and methane
- Vermicompost needs to be used right away or refrigerated to stay fresh, which takes up space in the fridge
- Needs adequate space in your home that’s not close to where people eat, sleep, etc
- Separating your worms from the compost can be a little bit gross


